|
|
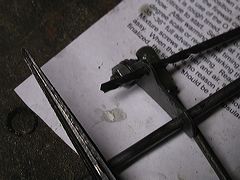
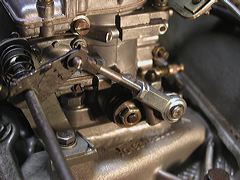
Here's a tapered reamer (left), the bellcrank, and a #10 drill bit stuck through the hole -- proving that I've gotten it the right size. |
|
|
The "foot" that supports the throttle rod bolts onto the manifold. The spacing is tight here, so the support foot furnished by MSS is bent slightly to clear the accelerator pump housing on the end of the carburetor. Mine still touched the carb, so I added a bit more bend. |
|
|
The linkage rod itself is a nice piece with a spherical bearing at one end, a sturdy spring clip at the other, and a provision in the middle for adjusting the rod's overall length. You need to make sure the rod is adjusted so the throttle opens and closes fully when the accelerator pedal moves through its range. |
|
|
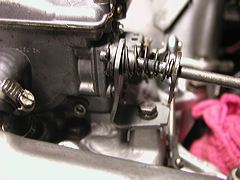
This circular cam around the throttle arm operates the accelerator pump. I've removed the pump arm here so the cam is more visible. I thought the cam was making the throttle action a bit stiff, so I smeared a little white lithium grease on this cam. |
|
|
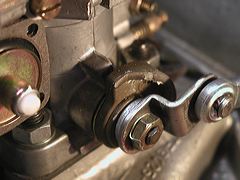
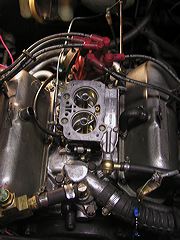
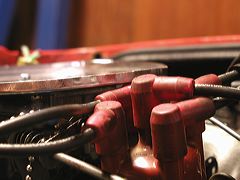
Here's a view of the finished throttle linkage. Note that the bellcrank needs to be set so that opening the throttle makes it turn UPward. That's the normal position for a FoMoCo or Weber carb, so if your car had one of these carbs previously, it should be fine.
However, a Solex carb uses a different arrangement, with the bellcrank turning DOWNward. My car previously had a Solex, and when I put the MSS kit on, I at first forgot to change the linkage (even though the correct position was shown clearly in the photos that came with the instructions.) The result was a very "notchy" throttle action -- either all the way closed or all the way open. Once I realized my mistake and reversed the bellcrank, the problem went away -- but it took a long time to figure out.
So, if your car previously had a Solex, DON'T make this mistake! |
|
|
With the manifold, carb, linkage and cooling hoses reinstalled, it's time for a quick test start. |
|
|
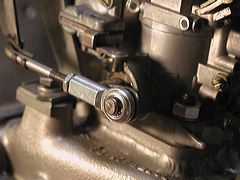
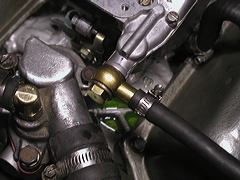
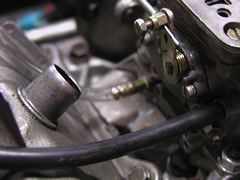
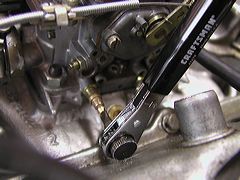
Oops! Turned out there were a few leaks. The coolant leak visible in this picture turned out to be trivial -- I just hadn't tightened a hose clamp enough. But there was also a fuel leak that could have caused a fire.
The cause turned out to be this bolt that holds on the brass fuel-line fitting in the middle of the picture. (This is called a 'banjo fitting' because of its shape, and the bolt that runs through its middle to secure it is called a 'banjo bolt.')
I found that I hadn't tightened the banjo bolt enough -- it has to be turned down pretty firmly to avoid leaks. Once it was secured, the fuel stayed inside where it belonged. |
|
|
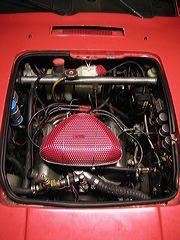
I've installed the air filter to check clearances, even though it will have to come off again to do the final setup of the carburetor. |
|
|
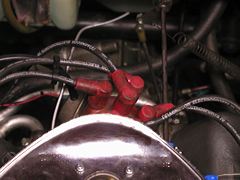
Oops (again!) There's not quite enough clearance between the baseplate of the air filter and the wires coming out of the distributor cap. You can see in this picture that the air filter baseplate actually is pressing down slightly on one of the wires. MSS says that won't do any harm if the wires are in good shape, but I didn't like it -- I was afraid it might interfere with moving the distributor to set the ignition timing. |
|
|
So, I got out a body hammer and bashed a slight step into the plate. The step is visible here as a bright reflection. It wasn't the neatest job in the world -- but once the filter is back on, it won't be seen. |
|
|
Just a few more hookups: vacuum hose (supplied with the kit) runs from a fitting on the carburetor to the distributor's vacuum chamber, and a manual choke cable (NOT supplied with the kit) attaches to the cold-start lever on the carb . |
|
|
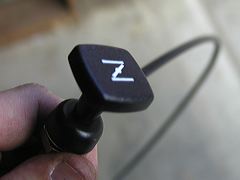
I started out with a generic "Help" brand cable from Autozone. But later, when I was ordering some other parts from Pierce Manifolds, I splurged and spent $10 on a 49-inch "official" choke cable. Not only does it have a choke symbol on it, it's limper than the generic cable (making it easier to thread into the engine compartment) and it operates more smoothly as well. TIP: Pierce sells two other choke cables besides the 49-incher -- one shorter and one longer. DON'T order the shorter one! The 49-inch cable was just barely long enough, and the shorter one (I think it's 36 inches) would have been much too short! |
|
|
With the basic installation completed, it's time for the sometimes laborious process of setting up and tuning the carburetor. Step 1 is to set the idle screws. They're buried down in the V of the engine, so I had to buy this little right-angle screwdriver to turn them. |
|
|
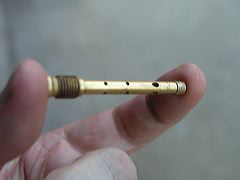
Another thing that can be fine-tuned on a Weber carburetor is the jetting. This picture shows one of the main jet assemblies (there are two in a DCNF, one for each barrel.) The threaded piece at the thumb end is the air corrector; the holey piece in the middle is the emulsion tube; and the small cap at the far end is the main jet. The MSS kit comes with jets chosen to get you up and running, but if you want to fine-tune them -- as I did -- they're conveniently easy to change. |
|
|
The jet assembly just screws into a well on the top of the carburetor. The idle jets work similarly, but their carriers are smaller and screw into the ends of the carb. |