Weber DCNF installation 1-15 | 16-30 | 31-45 | 46-57
One of my more ambitious projects the past season was to install a Weber DCNF induction kit, a then-new product made by Motor Sport Services (MSS) of Jamestown, NY.
Sonetts originally came equipped with a single-barrel carburetor on a matching manifold, and it's a common performance-boost to replace the carburetor with a progressive two-barrel unit such as the Weber 32/36 DGAV. This requires a different manifold with a base that fits the two-barrel carburetor. At one time Saab sold this manifold as a performance part, and later-model Saab 96 cars sold in Europe (late 1977 through 1980) came with it as standard equipment, mounting a Solex two-barrel progressive carburetor.
Now, however, these two-barrel manifolds are a bit difficult to find -- and even if you've got one, its convoluted airflow path (necessary to fit under the Sonett's low hood) means it's not the ideal for performance.
So, Jack Lawrence of MSS came up with a different idea. He started out with the easily-obtainable single barrel-manifold and modified it by cutting and welding to fit a two-barrel carburetor. The carb he chose was the Weber DCNF, a compact synchronous carburetor.
[What's all this about 'progressive' and 'synchronous'? In a progressive carburetor, the primary barrel opens first, and the secondary barrel doesn't begin to open until you begin to approach full throttle. In a synchronous carburetor, both barrels open equally at the same time.
In theory, the progressive approach is better: you get the fuel economy and throttle response of a small single-barrel carburetor for around-town driving, but the airflow of a larger two-barrel carburetor when you need full throttle.
In practice, though, the restrictive manifold needed to mount the progressive carb on a Saab V4 has compromised its performance. The advantage of the MSS setup isn't so much that it uses a synchronous carb, as that it allows the use of a better-breathing manifold.]
MSS now offers this setup as a complete kit. You supply your reusable single-barrel manifold as a 'core,' to be modified into someone else's two-barrel manifold. You receive an already-modified two-barrel manifold, a professionally-rebuilt Weber 40DCNF carburetor, an air filter, and the linkage pieces necessary to hook up everything.
Installing the kit is a fairly ambitious project: you need to replace the manifold, install the carburetor, tinker a bit to make the linkage fit your particular installation, and finally tune up everything for optimum results. The kit comes with clear, photo-illustrated instructions... but I still found ways to mess up a few things! I'll try to cover those in the 'photo diary' that follows.
|
|
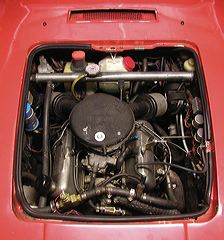
As usual, I have started the operation by removing the engine lid, to allow access from all directions. |
|
|
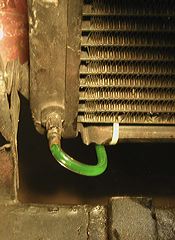
Next I've drained the coolant by opening the drain tap at the bottom of the radiator. When you do this, remember to move the heater control all the way to the 'Hot' position, and open the heater core's bleed valve on the firewall. These steps let the cooling system drain more fully. |
|
|
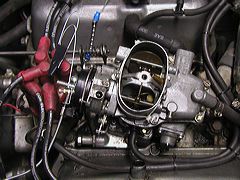
Here's the incumbent carburetor, a Solex 34/34 TDID. This is a progressive two-barrel carburetor used on V4 Saabs in Europe from mid-1977 onward. (The tangle on the left is the end of the cable I installed when I converted the Solex to use a manual choke. I've folded and taped the end of the cable so I don't poke myself while working.) |
|
|
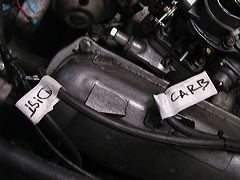
I've labelled the vacuum hoses so I'll know where to connect them when I put everything back together. |
|
|
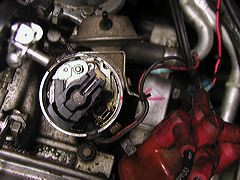
To remove the manifold, the distributor has to come out. When you do this, you want to mark the distributor's position -- reinstall it in this position and your ignition timing should be at least reasonably close.
The distributor has an index mark on the case; I put a red mark on it to make it easier to see, and added a matching arrow on the top of the transaxle (at right.) I'll refer to this picture later to make sure the rotor is pointing to the correct position. |
|
|
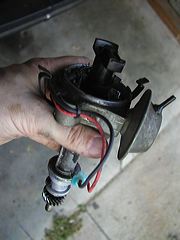
Once its position is marked, I pull the distributor out of the engine. To do this, you remove the hold-down bolt and clamp on the base, and pull the distributor out. The drive gear at the bottom has angled teeth, so you need to give the distributor a slight twist as you pull it out. |
|
|
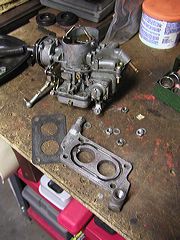
You can't remove the carburetor and manifold together - the carb blocks access to the center manifold bolts. So, off comes the Solex. In the foreground is the intermediate plate that provides the connections for the PCV valve and the power brake booster on the model 96. (The Sonett doesn't have a power brake booster, so I plugged this.) |
|
|
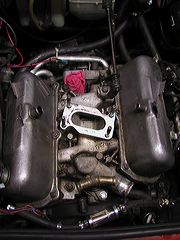
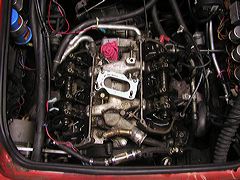
Now the manifold is exposed for removal. The red thing at the top that looks like a rose is actually a rag I stuffed into the distributor shaft hole, so I won't accidentally drop anything down into the gears. |
|
|
The rocker-arm covers have to come off too. |
|
|
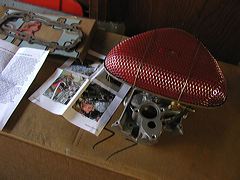
Before I plunge into removing the manifold, I've decided to see what's in the box from Motor Sports Service. The DCNF induction kit comes loosely assembled, with a sheet of instructions and installation photos.
The gaskets at upper left - one for the manifold, two for the rocker-arm covers, and one for the thermostat - aren't included in the price of the kit, but you'll need them unless you already have a set of spare gaskets. |
|
|
The kit's air filter is an Australian-made "Ram-Flo" item with a washable foam filter element. The spidery black framework is an internal plastic support that keeps the foam from collapsing. |
|
|
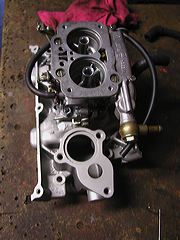
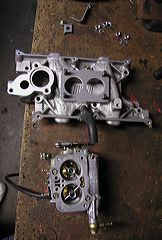
Here's the Weber DCNF carburetor on the manifold. |
|
|
Here's an overhead view with the carburetor and manifold separated. At the top are the new throttle-linkage support arm and its base, along with the mounting nuts and washers for the carb -- all included in the kit. The manifold comes with its PCV valve and hose already installed. The gasket for the carb baseplate (shown in position on the manifold) also is included. At the bottom is the carb, with the vacuum hose for the distributor already attached. |
|
|
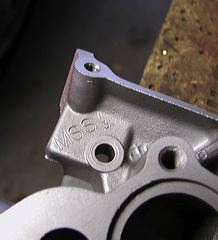
My manifold was stamped "MSS 3." Am I only the third person to buy one of these? |
|
|
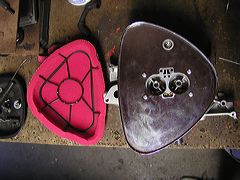
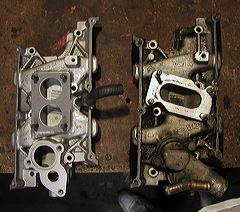
Here's an overhead comparison of the new MSS manifold (left) and the old European-spec two-barrel manifold. As you can see, both have roughly the same size inlet for air from the carburetor. But look at the passages that run from the inlet to the cylinder-head ports. The standard manifold's passages make several sharp turns, while the MSS manifold gives the mixture a nearly straight path to each port. That's the secret of the MSS manifold's better mixture distribution. |
1-15 | 16-30 | 31-45 | 46-57