|
|
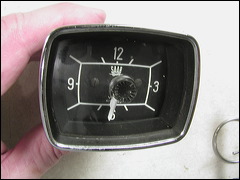
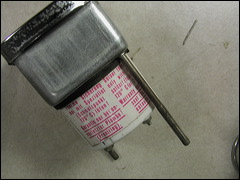
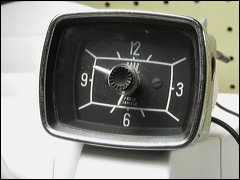
This "TV-shaped" dash clock is found in most later SAAB 95 and 96 models. Unfortunately, it's often found not to be working. Fortunately, you often can get it working again by replacing one part. |
|
|
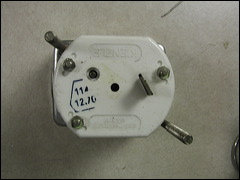
The guts of the clock actually were made by Kienzle, a high-end German clockmaker, and these little dash clocks have an excellent reputation among clock buffs. To get at the works, you have to remove these three small nuts and slide off the plastic back cover. (There's a sticker warning you that you'll void the warranty... but after 30+ years, I expect it's voided already!) |
|
|
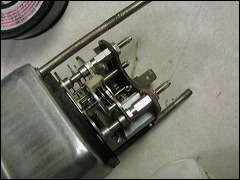
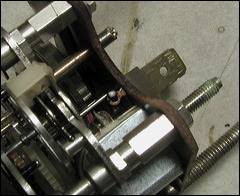
This picture shows the reason this clock has stopped working. See the spade-shaped electrical contact sticking out of the back? Now, see the small ring-shaped contact opposite it, just inside the circuit board? This contact is where good clocks go bad; we'll talk more about it in a minute. |
|
|
To fix the clock, it'll help to understand how it works. The mechanism is very clever. It's actually a basic spring-wound clock; the spring stores up just enough energy to run for a few minutes.
As the spring uncoils, an electrical contact on one end gets closer and closer to the fixed, paddle-shaped electrical contact you can see here. When the two contacts meet, they send electric power through a solenoid coil. The coil slaps the heavy silver flywheel you can see behind the electrical contact; that winds up the spring enough to run for a few more minutes.
When the clock is working properly, you'll hear the periodic "snick" of the flywheel winding the spring, then a steady ticking from the movement. |
|
|
Now back to that little ring-shaped terminal: It's mounted a bit loose on its copper strip, so it can flop around slightly, and it's supposed to be soldered to another terminal that you can see below it.
What usually goes wrong is that the solder melts, letting the ring-shaped terminal pop loose. This interrupts the electric current and keeps the solenoid from winding the clock.
To make sure that's the problem, you can hook up the clock to a 12-volt supply (I use a lantern battery) and briefly bridge these two terminals with a paper clip. If the rest of the clock is OK, you'll see and hear the solenoid swat the flywheel to wind up the spring, and the clock will start ticking.
Now, all you've got to do is apply a permanent fix. |
|
|
You might be tempted just to solder the terminals back together, but don't!
This sticker warns you that the connection is supposed to be joined with special low-temperature solder. If the temperature inside the clock gets above 120° C, the solder joint melts and interrupts the power. This prevents the clock from overheating and damaging its plastic gears if (for example) the winding mechanism should jam. A regular fuse might not blow soon enough to prevent this damage.
The problem with this is that I had no luck finding that special 120°C solder! But, I did find something else that will still provide overheating protection. |
|
|
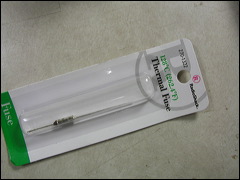
Here it is. This thermal fuse from Radio Shack is made for repairing microwave ovens. But its temperature rating (128°C) is close enough to the original that I figured it should work... at least, it's better than nothing! |
|
|
It's a tight fit -- but you CAN solder the thermal fuse between the two contacts by cutting its leads off short and bending them so the fuse will fit inside the case.
You might want to test again with the lantern battery before sliding the case back on and attaching it with the three small nuts. |
|
|
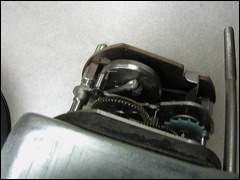
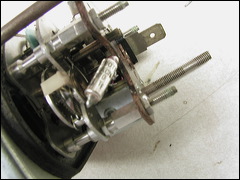
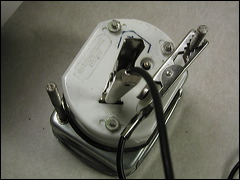
This picture (with the case back on) shows how to apply power for the test. Clip one lead of the 12v lantern battery to the spade lug on the back of the clock, and the other lead to one of the two long rods to provide a ground.
You can let the clock run for a few hours to make sure it will keep working; if you want, tweak the tiny adjustment screw (seen here between the clips) if the clock runs a bit fast or slow. Don't overdo this, though -- it's a sensitive adjustment! |
|
|
Once you're satisfied with your fix, the clock is ready to go back into your SAAB. Imagine the envy of your friends when they see that your clock works! |